How to automatically remove older emails from Exchange and Outlook
In this guide, we’ll explain how to automatically remove older emails from your mailbox, using Exchange and Outlook’s features.
For all organizations already using archiving, this can be an efficient, hands-free way to cut down on the total number of items in Exchange and the disk space their email occupies, which enhances performance and stability.
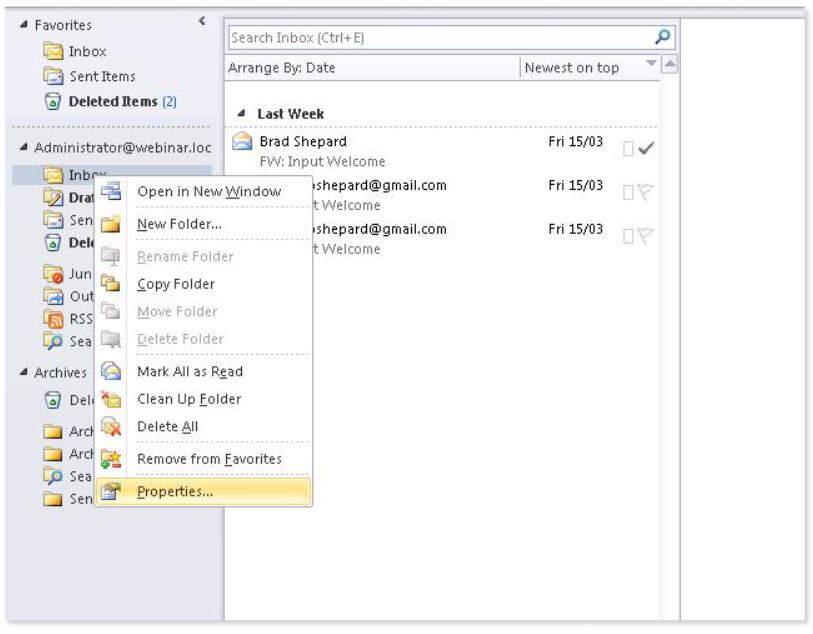
First, right-click on a folder and select ‘Properties’. We’ve started with ‘Inbox’, but you’ll need to repeat this process for each folder you want to clean automatically.
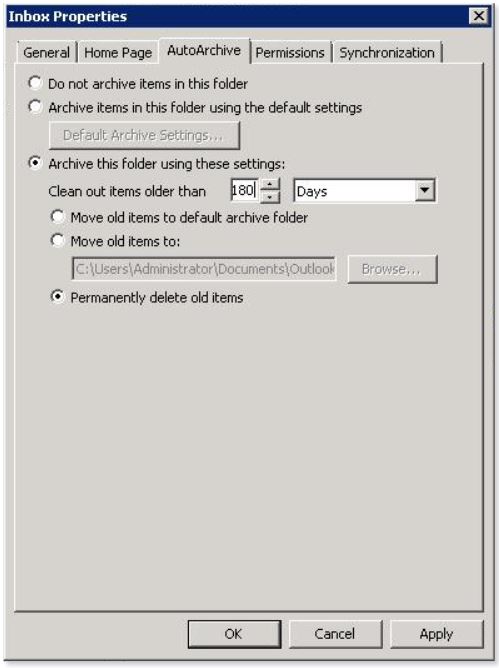
Now, click on the ‘Auto-Archiving’ tab and set it to archive items older than the 180 days (as shown), or whatever the desired amount of days/months/years may be.
Select the ‘Delete’ option, as shown.
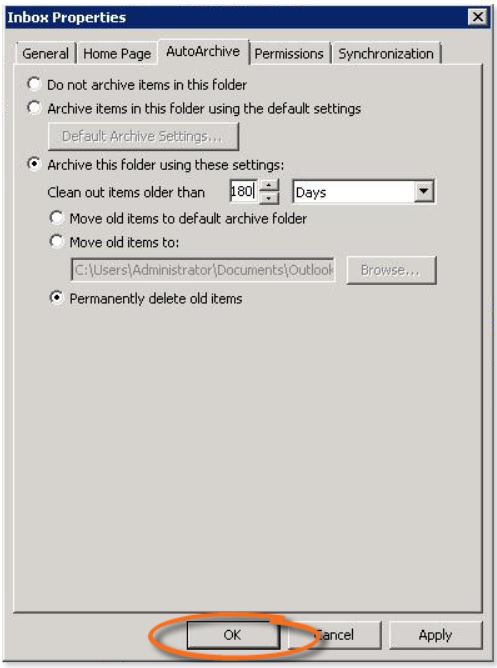
Click ‘OK’ when finished.
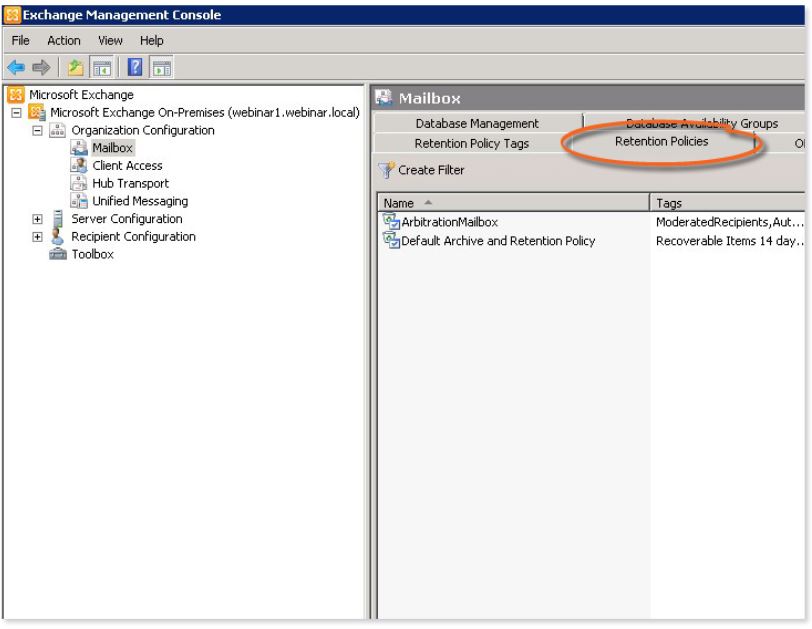
Go to ‘Organization Configuration’ and select ‘Mailbox’, then click ‘Retention Policy Tags’.
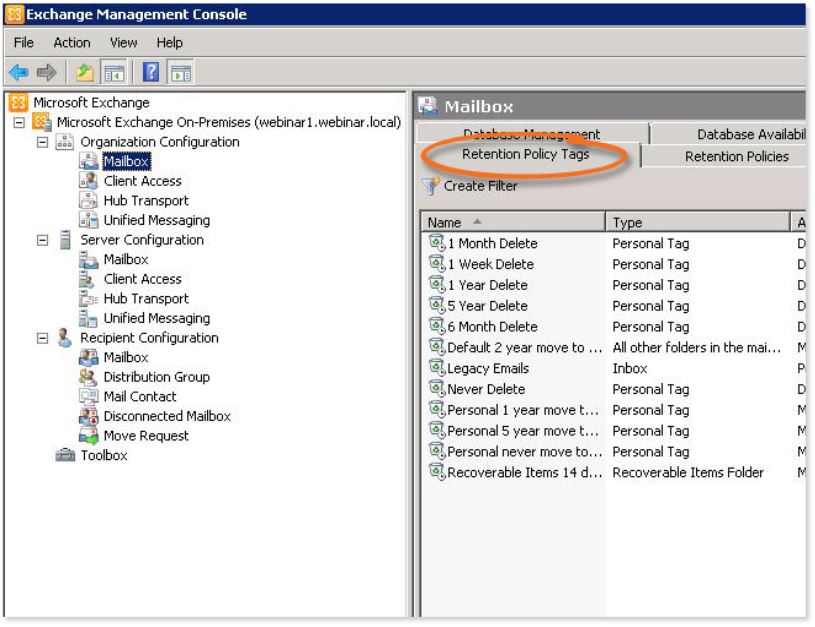
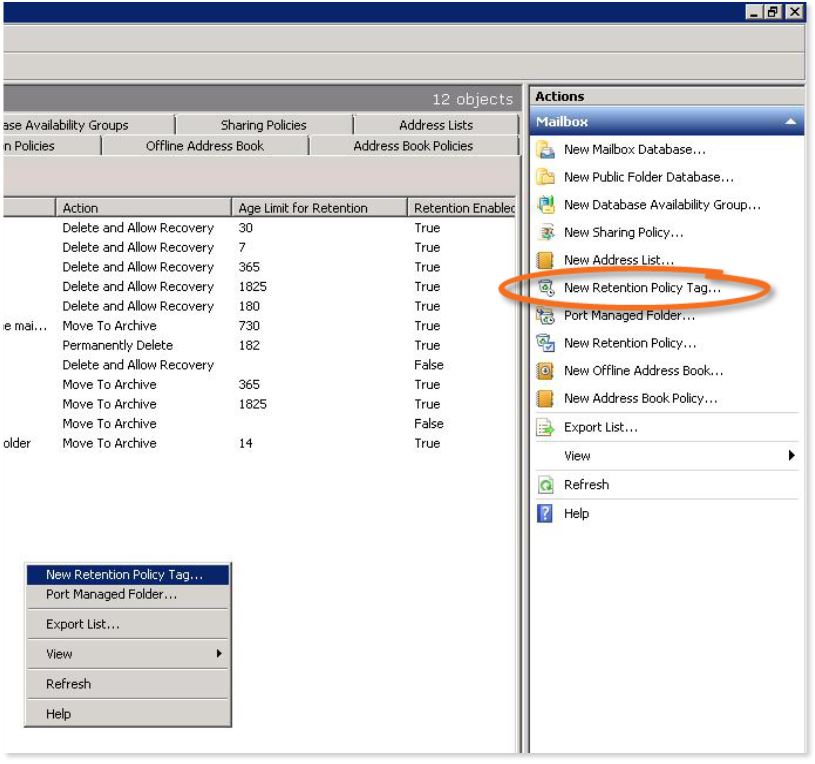
Click ‘New Retention Policy Tag’ on the right side-bar (as circled).
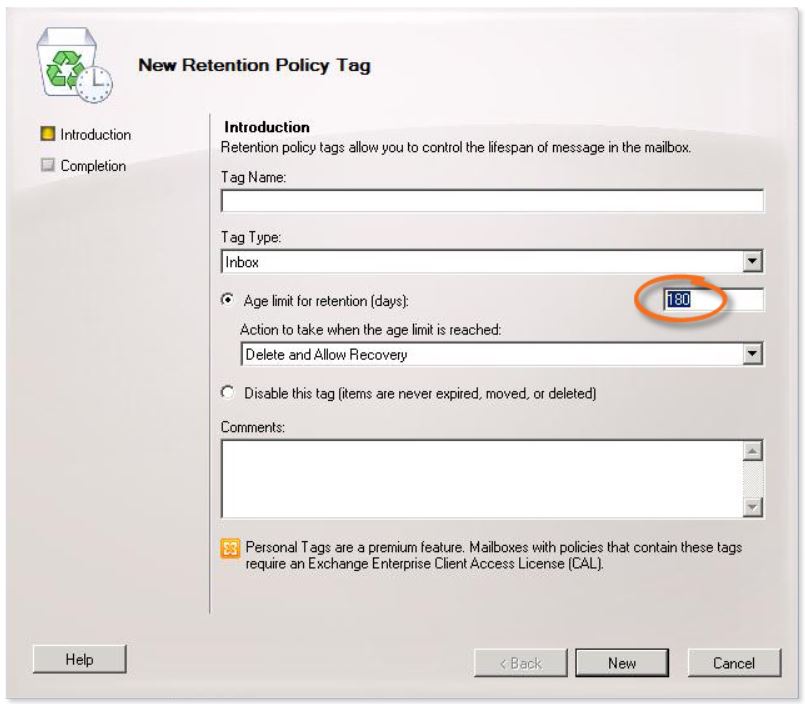
Define the number of days an email can be held for. In this example, we’ve set this to 180, which means emails more than 180 days old will be deleted.
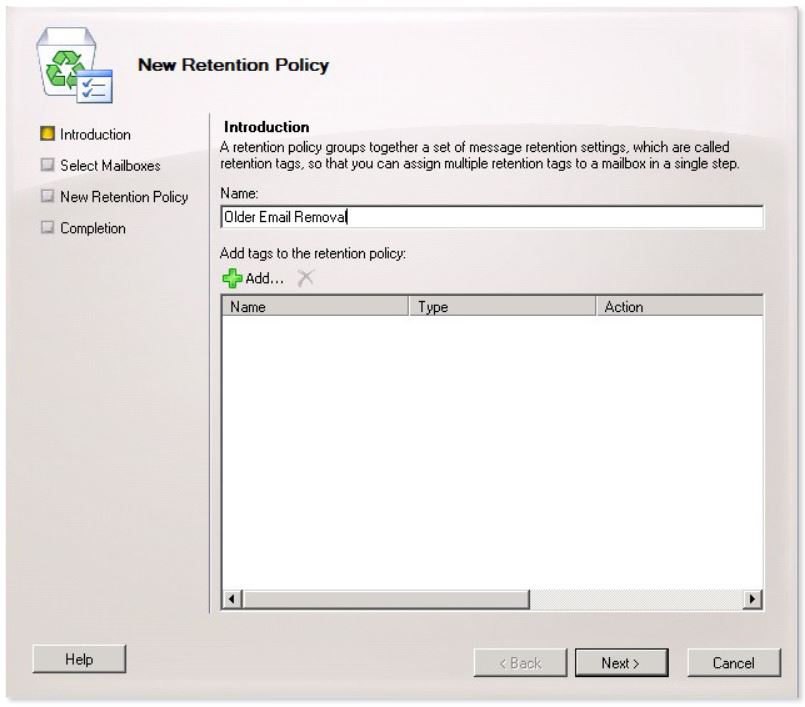
Finally, enter a name for your retention policy and click ‘New’ to create your retention policy.

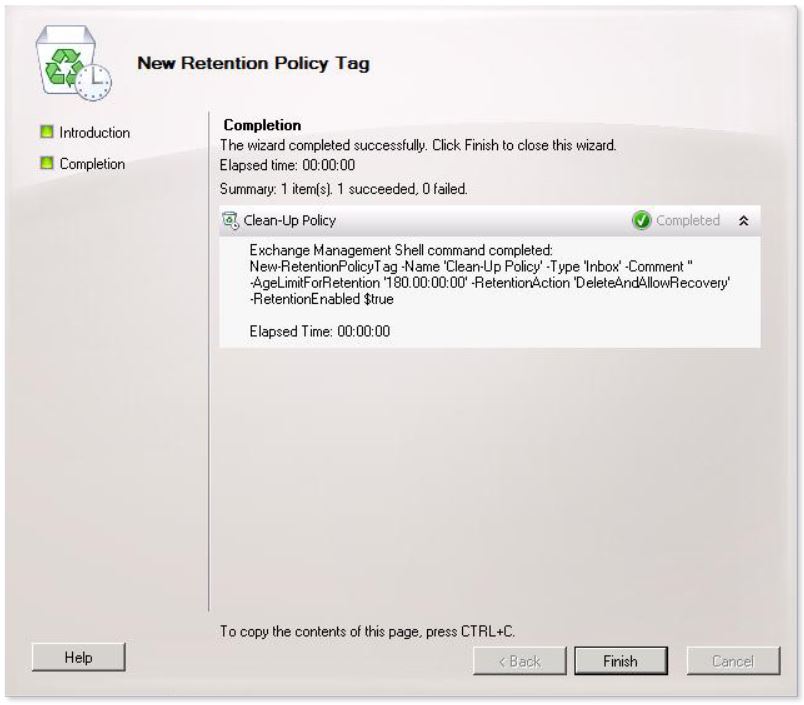
The Exchange Management Console will display a progress bar briefly while it creates the policy, followed by a ‘Success’ message to confirm the policy was created successfully.
Click ‘Finish’ to exit the wizard.
Now click the ‘Retention Policies’ tab.
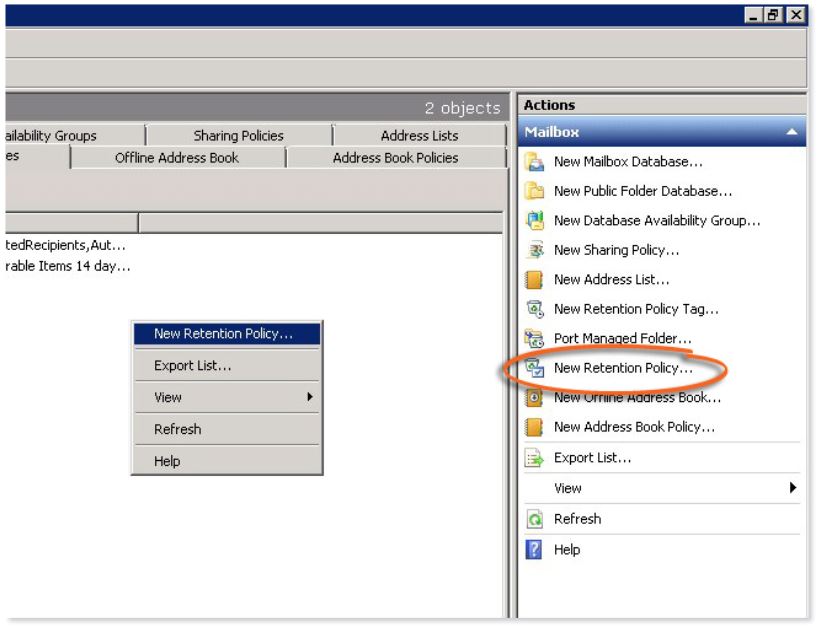
Click ‘New Retention Policy’, as highlighted below, or right click in a blank area and select ‘New Retention Policy’.
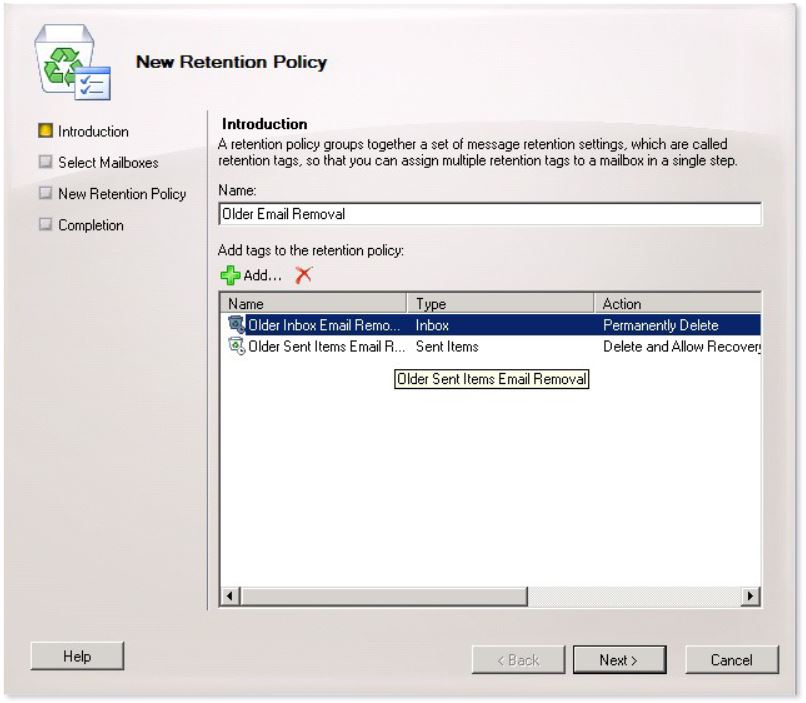
Then, click ‘Add’ to associate the appropriate Retention Policy Tags with it. In this example, tags for removing older email in the inbox and sent items folders have been selected. Hold ‘CTRL’ to select more than one tag at once. Click ‘OK’ when you’ve selected all the desired tags.
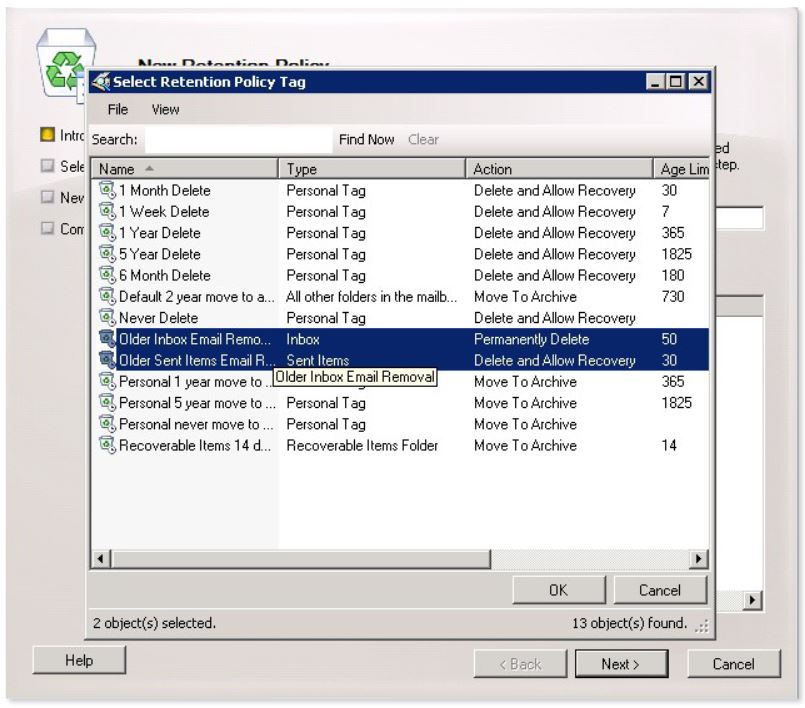
Click ‘Next’ when you’ve selected all the desired tags for this policy (e.g. tags for sent items, inbox, junk).
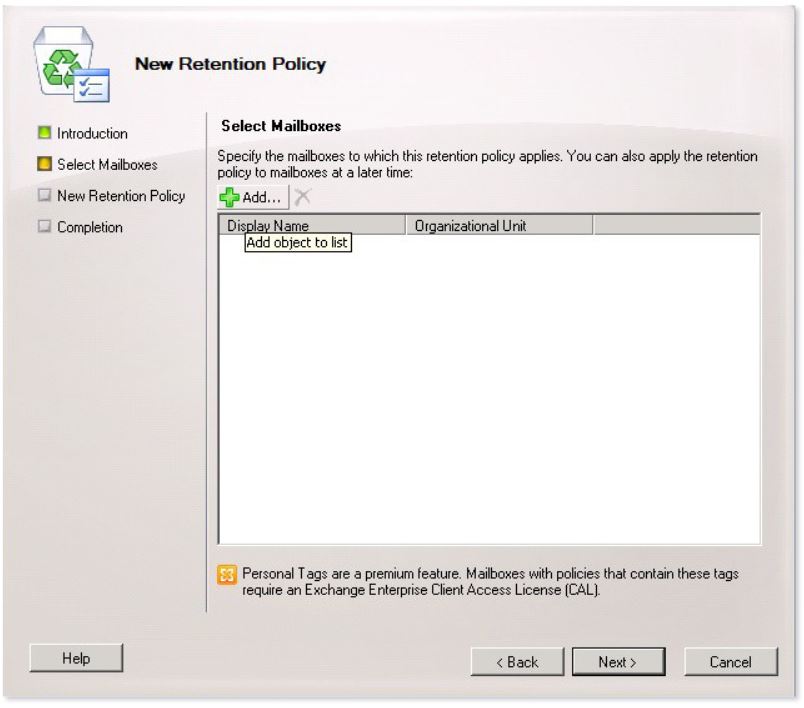
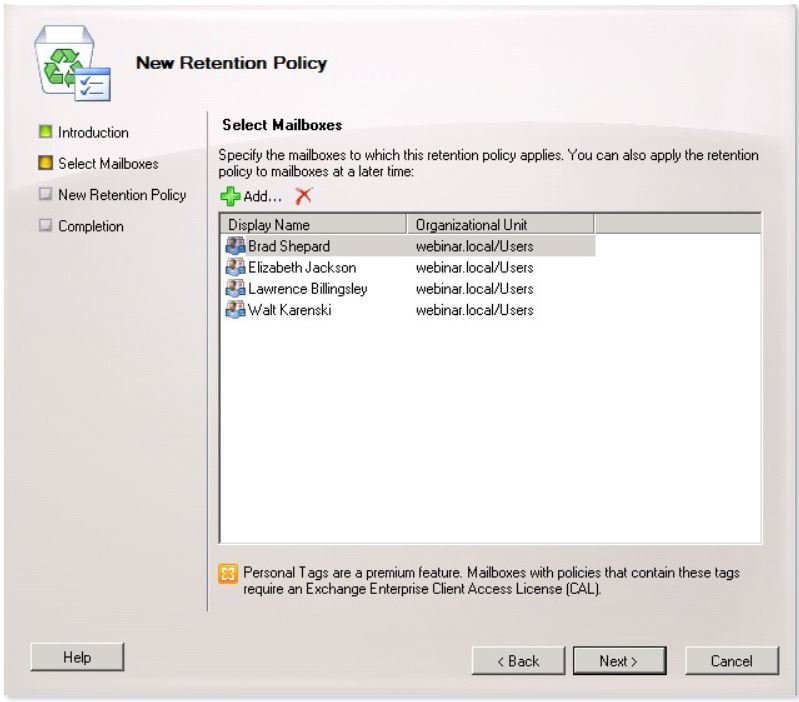
Click ‘Add’ to add the mailboxes this should apply to.
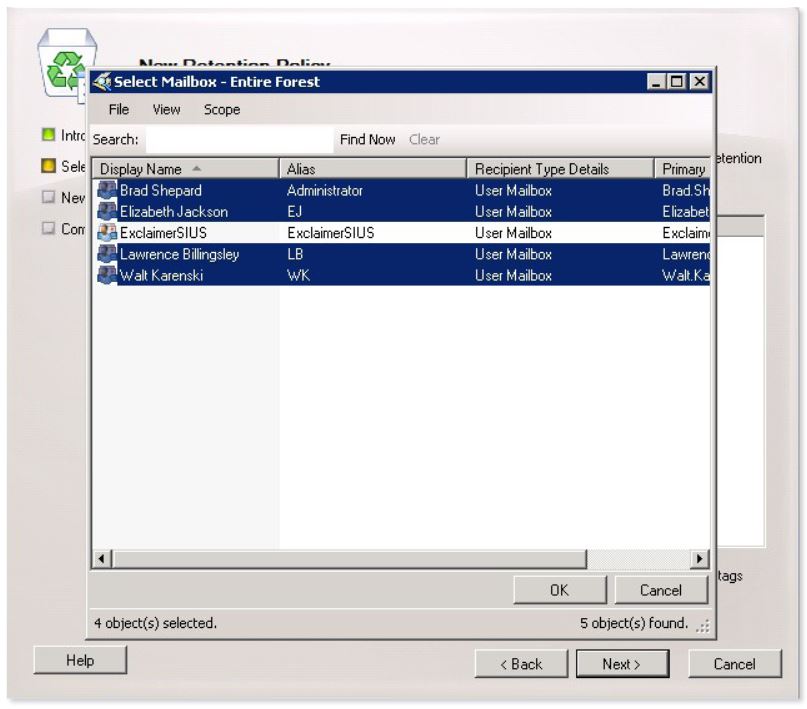
Now select the mailboxes this should apply to. You can press ‘CTRL’ and ‘A’ to select all of the visible mailboxes, which can save time. Hold ‘CTRL’ and click a mailbox if you’d like to de-select that one, while keeping the rest selected. Click ‘OK’ when you’ve selected all the mailboxes you want this retention policy to apply to.
Check to ensure all the desired mailboxes have been selected and click ‘Next’ when ready.
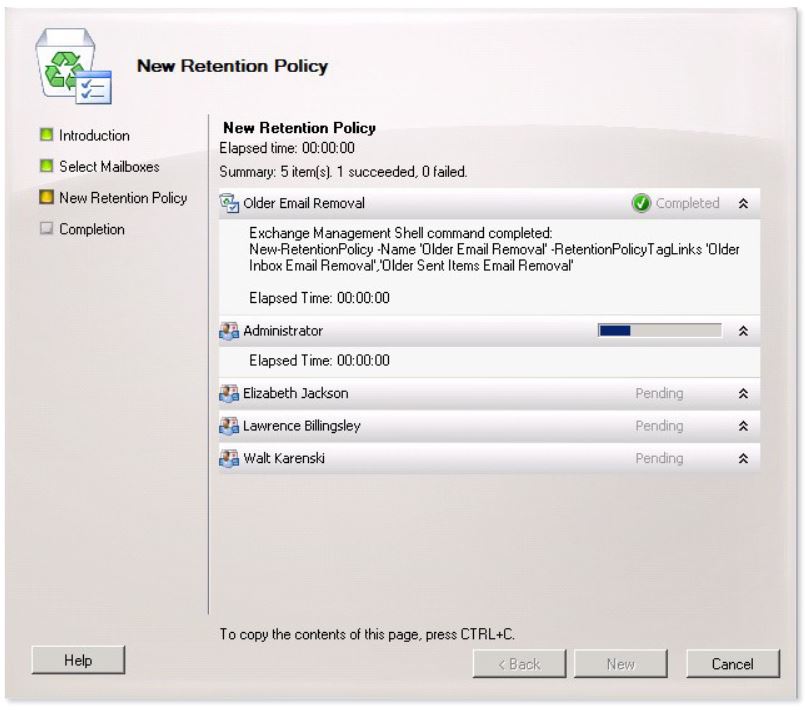
The wizard will display the tags and mailboxes associated with your policy. Ensure they’re correct before clicking ‘New’, which will create and apply the new policy.

For all organizations already using archiving, this can be an efficient, hands-free way to cut down on the total number of items in Exchange and the disk space their email occupies, which enhances performance and stability.
In Outlook
Here, we’ll set up an auto-archiving policy that deletes older emails automatically.First, right-click on a folder and select ‘Properties’. We’ve started with ‘Inbox’, but you’ll need to repeat this process for each folder you want to clean automatically.
Now, click on the ‘Auto-Archiving’ tab and set it to archive items older than the 180 days (as shown), or whatever the desired amount of days/months/years may be.
Select the ‘Delete’ option, as shown.
Click ‘OK’ when finished.
In Exchange
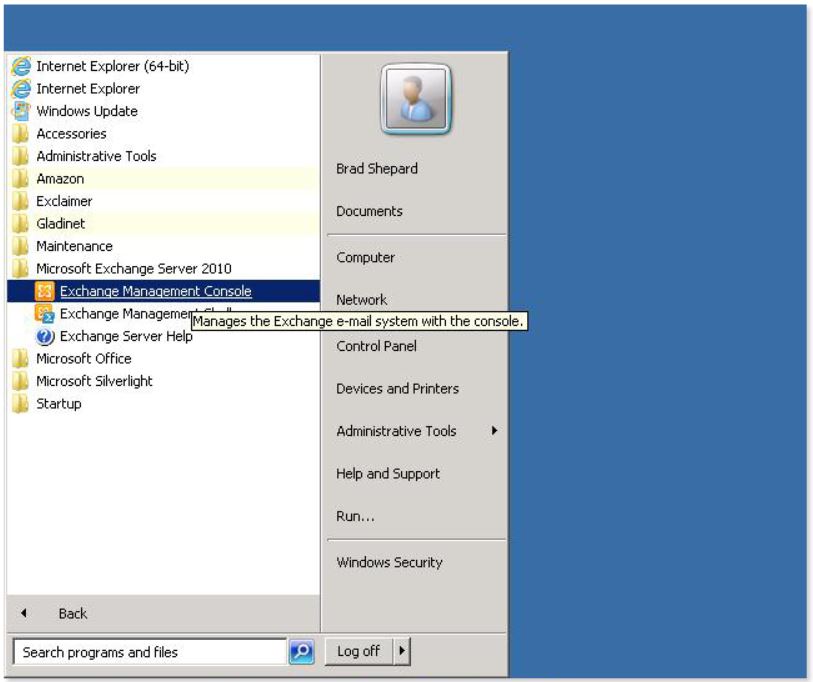
Go to the Exchange Management Console (under Microsoft Exchange 2010 in the Start menu on your server).Go to ‘Organization Configuration’ and select ‘Mailbox’, then click ‘Retention Policy Tags’.
Click ‘New Retention Policy Tag’ on the right side-bar (as circled).
A ‘wizard’ will open to guide you through creating your retention policy.
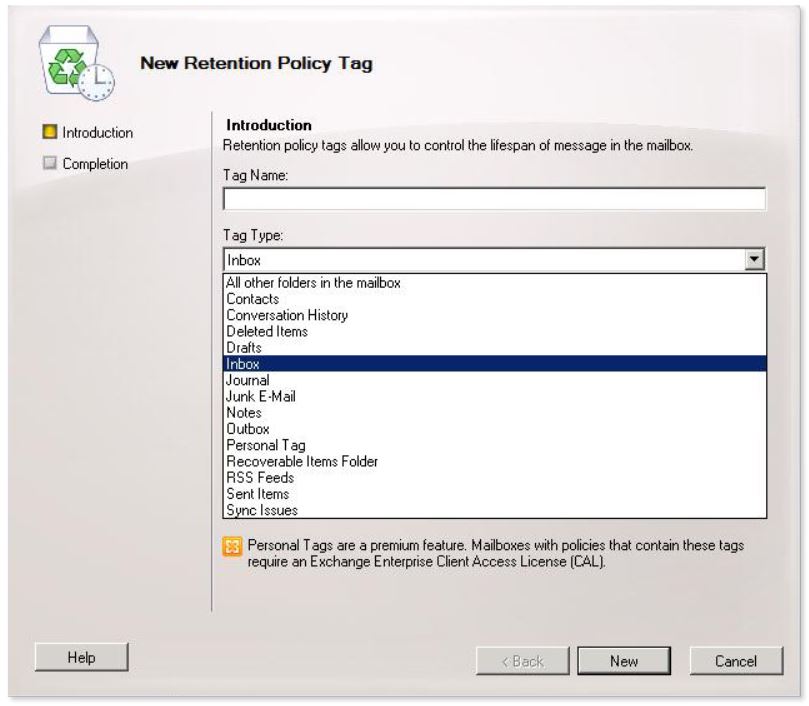
First, select the folder you want to clean from the drop-down menu shown below. We’ve selected ‘Inbox’ and, as you’d expect, to clean ‘Sent Items’ or ‘Drafts’, you’d need separate policies for each.
First, select the folder you want to clean from the drop-down menu shown below. We’ve selected ‘Inbox’ and, as you’d expect, to clean ‘Sent Items’ or ‘Drafts’, you’d need separate policies for each.
Define the number of days an email can be held for. In this example, we’ve set this to 180, which means emails more than 180 days old will be deleted.
Finally, enter a name for your retention policy and click ‘New’ to create your retention policy.
The Exchange Management Console will display a progress bar briefly while it creates the policy, followed by a ‘Success’ message to confirm the policy was created successfully.
Click ‘Finish’ to exit the wizard.
Now click the ‘Retention Policies’ tab.
Click ‘New Retention Policy’, as highlighted below, or right click in a blank area and select ‘New Retention Policy’.
Give the policy a name.
Then, click ‘Add’ to associate the appropriate Retention Policy Tags with it. In this example, tags for removing older email in the inbox and sent items folders have been selected. Hold ‘CTRL’ to select more than one tag at once. Click ‘OK’ when you’ve selected all the desired tags.
Click ‘Next’ when you’ve selected all the desired tags for this policy (e.g. tags for sent items, inbox, junk).
Click ‘Add’ to add the mailboxes this should apply to.
Now select the mailboxes this should apply to. You can press ‘CTRL’ and ‘A’ to select all of the visible mailboxes, which can save time. Hold ‘CTRL’ and click a mailbox if you’d like to de-select that one, while keeping the rest selected. Click ‘OK’ when you’ve selected all the mailboxes you want this retention policy to apply to.
Check to ensure all the desired mailboxes have been selected and click ‘Next’ when ready.
The wizard will display the tags and mailboxes associated with your policy. Ensure they’re correct before clicking ‘New’, which will create and apply the new policy.
If successful, the ‘New Retention Policy’ wizard will display a ‘Completed’ next to each component of the policy. Click ‘Finish’ to close the wizard and finish creating your policy.
Customer support service by UserEcho