How do I deploy signatures to remote users?
This article provides information on how to configure your system to deploy signatures to users who work remotely or use computers that are not joined to the Active Directory domain. Having installed Exclaimer Signature Manager Outlook Edition, detailed help for all aspects of the application is available from the help menu.
Introduction
If you have remote users who use computers that are not joined to the Active Directory domain to access your network, you can configure the system to deploy signatures to their local copy of Outlook.
To achieve this, you need to:
- Deploy signatures for remote users to a given directory.
- Configure an Internet facing Virtual Directory in IIS.
- Install a copy of the Exclaimer Outlook Settings Update Client on the remote computer.
Define a deployment directory for remote users
There are two options for setting a deployment directory for remote users:- Option 1 - configure each remote user separately
- Option 2 - have all users retrieve their signature from the same place
- A UNC path. For example \\DC1\Outlook Signatures
- A local folder. For example C:\Outlook Signatures
Procedures for both options are detailed below.
Option 1 - configure each remote user separately
For each user requiring deployment of a remote signature, you must edit the configuration file for the network-based ExSync agent.
- Locate and open the required ExSync.cfg file. This file can be found in the relevant network share, as specified on the settings tab for the selected signature deployment policy - for example:
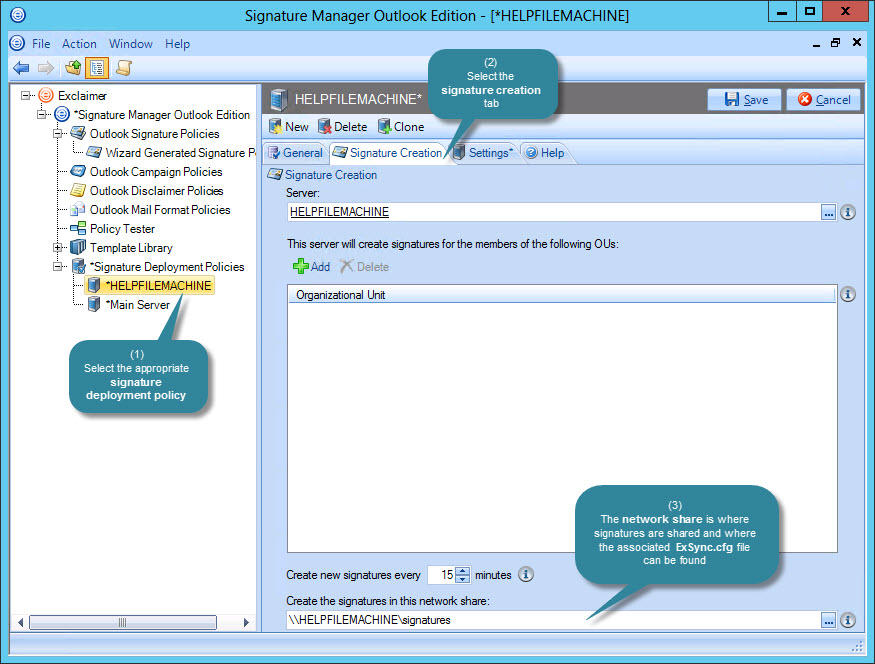
The number of signature deployment policies found will vary from one organization to another. Many organizations will only ever need the one signature deployment policy that is automatically created when Exclaimer Signature Manager Outlook Edition is installed.
- Open the ExSync.cfg file in Notepad (or a similar text editing program). The content of this file should be similar to the example shown below:
- Add the following lines to the configuration file:
[RemoteUsers]
{DefaultSMTPAddress}={RemoteSignatureLocation}Where {DefaultSMTPAddress} is the SMTP Address of a remote user and {RemoteSignatureLocation} is the location to which you will point the virtual directory.
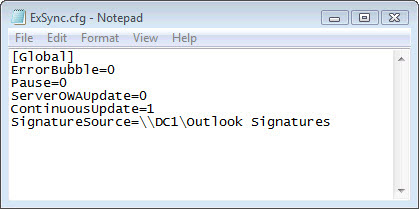
For example:
[RemoteUsers]
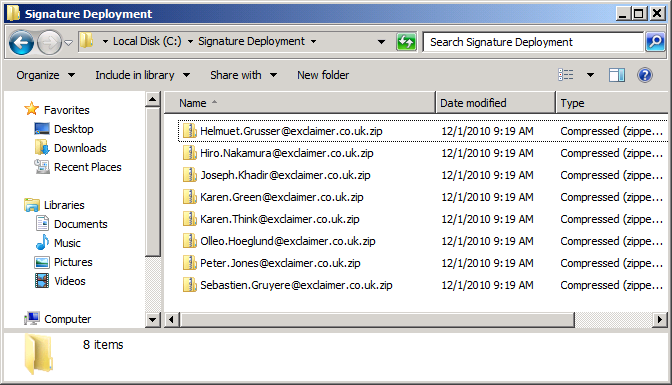
Peter.Jones@exclaimer.co.uk=C:\Signature DeploymentThe final configuration file should look similar to the example below:
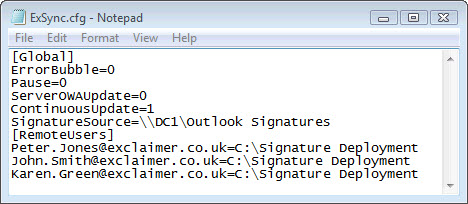
| These changes will not take effect until the next time signatures are generated. This can be triggered by saving the configuration in the console. Remember that if multiple signature deployment policies are defined, you may need to update multiple ExSync.cfg files (each signature deployment policy is associated with its own ExSync.cfg file). |
Option 2 - configure the product to deploy all user signatures to the same location
- Open the relevant ExSync.cfg file in Notepad (or a similar text editing program). The content of this file should be similar to the example shown below:
- Beneath the [Global] section, add the following line:
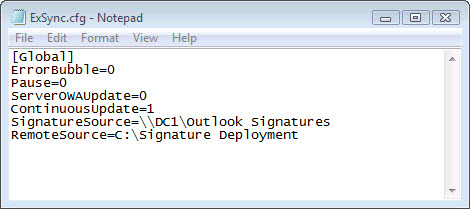
RemoteSource={RemoteSignatureLocation} Where{RemoteSignatureLocation} is the location for the virtual directory.
For example:
RemoteSource=C:\Signature Deployment
The final configuration file should look similar to the example below:

| Remember that if multiple signature deployment policies are defined, you may need to update multiple ExSync.cfg files (each signature deployment policy is associated with its ownExSync.cfg file). |
Configuring an Internet facing virtual directory in IIS
The configuration process for both IIS 6 and IIS 7 is detailed in the following sections.
Configuring a virtual directory using IIS 6
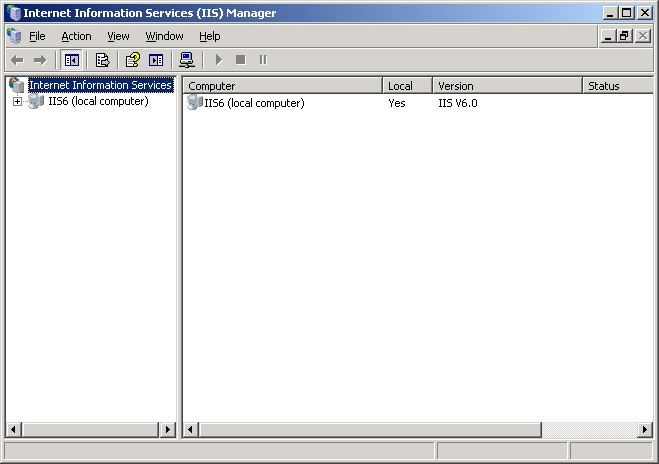
- Open Internet Information Services Manager (inetmgr.exe):
- Expand nodes and locate the Default Web Site entry:
- Create a new Virtual Directory (Action > New > Virtual Directory...):
- Click next to launch the Virtual Directory Creation Wizard:
- Click next and enter an alias (with which users will connect to this virtual directory):
- Click next and then Browse to navigate to the Remote Deployment Location (as described previously):
- Click next to set permissions. Here you can accept default permissions however, only Read permissions are required:
- Click next to confirm settings and then finish to exit from the wizard:


Now when you check the content of the virtual directory, you will see that deployed signatures are present:

Configuring a virtual directory using IIS 7
- Open Internet Information Services Manager (inetmgr.exe):
- Expand nodes and locate the Default Web Site entry:
- Right-click on the Default Web Site node and select Add Virtual Directory..:
- Enter an alias and a Deployment Folder Location:
Installing the Exclaimer Outlook Settings Update Client on remote computers
The Exclaimer Outlook Settings Update Client must be installed on each remote computer and or computers that are not joined to the Active Directory domain. To achieve this, the following preparation is required:
- Each end user should download the Exclaimer Outlook Settings Update Client (an MSI file) to their computer. This file is added to your Exclaimer Signature Manager Outlook Edition installation directory when the product is first installed. It can be copied from here and distributed to remote users, as required.
- You will need to know the URL of the remote signature location and the SMTP Address for each user's account (your network administrator should be able to provide this information).
The client installation process
- Double-click the MSI file to launch the Exclaimer Outlook Settings Update Client Setup wizard:
Note: The Exclaimer Outlook Settings Update Client.msi package can be located in the Signature Manager Outlook Edition installation directory. (default C:\Program Files (x86)\Exclaimer Ltd\Signature Manager) - Click next to view and accept the License Agreement:
- Click next to define an installation location. By default, this is set to Program Files:
- Click next to define user settings for the application. Here, the SMTP Address should be defined as the user's default email address and the Remote Signature Location should be defined as the external Web address of the deployment location for signatures. In our example this will be:
- SMTP Address: 'peter.jones@exclaimer.co.uk'
- Remote Signature Location: 'http://www.mycompany.co.uk/Signatures'
- Click next to confirm settings:

- Click install to perform the installation. Upon completion you have the option to immediately start the Remote Client, or it will be started the next time the user logs on to their computer:
- You can check that ExSync is running by viewing processes in Windows Task Manager:
- Signatures are now deployed to this computer and can be seen in Microsoft Outlook. If any errors are encountered updating signatures, they will be shown in the Application Event Log of this computer.


Customer support service by UserEcho