Adding RSS feeds to email signatures with Signature Manager
Here we’ll describe how to insert RSS feeds, which can be used to pull across your most recent Tweets, blog posts, updates and more.
We’ll cover the software’s user interface for inserting RSS feeds, some of the customization it allows, adding the RSS feed URL and making sure it functions correctly.
In this example, it’s ‘http://www.msexchange.org/articles-tutorials/feed.rss’, replace the URL with your own chosen RSS feed URL to make your own RSS feed.
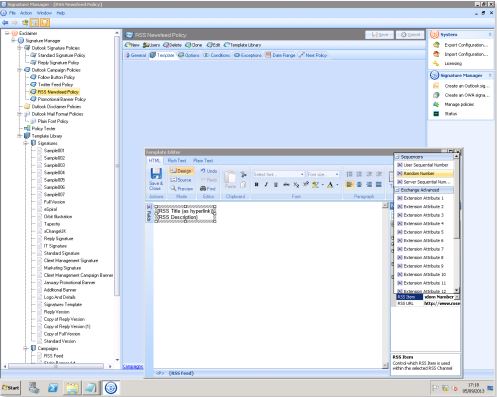
Open the template editor in our software – make sure you select the right policy.
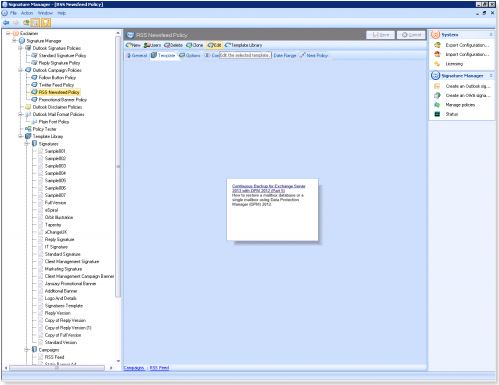
Select the area you’d like your feed to appear.
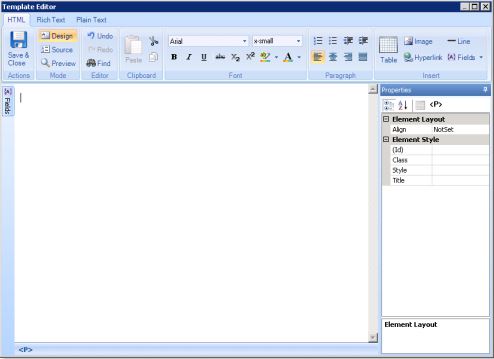
Click ‘Fields’ in the top-right corner, then ‘Dynamic Content’ and then ‘RSS Feed’ – or right-click and choose ‘Insert Field’, then ‘Dynamic Content’ then ‘RSS Feed’.
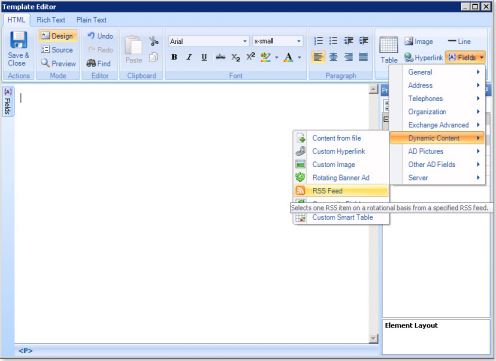
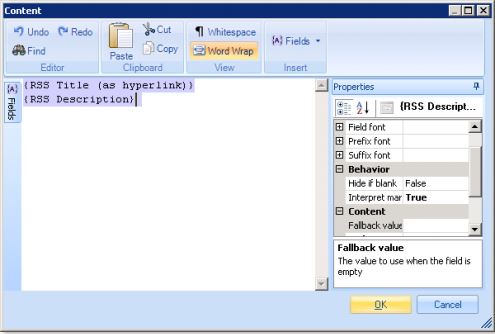
This opens a dedicated RSS feed editor. Here, we can decide what content from the feed will be displayed.
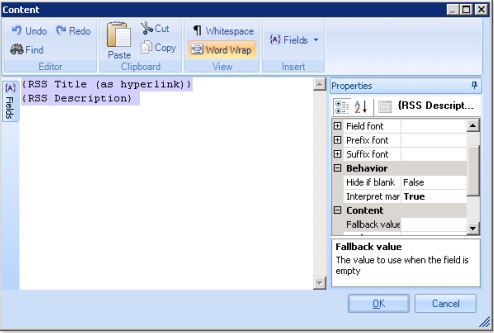
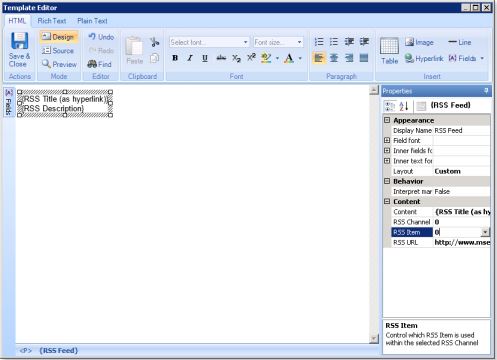
Click ‘Fields’ on the left to open a menu of the available content categories. Different social networks provide different content under these categories – in some social media providers, the ‘RSS Title’ field might have identical content to the ‘RSS Description’ field. You can use our ‘Preview’ function to ensure you’re happy with the appearance, which we'll describe later on.
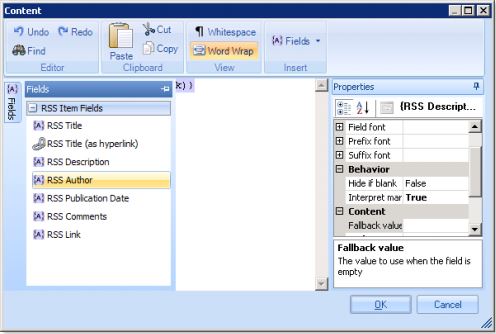
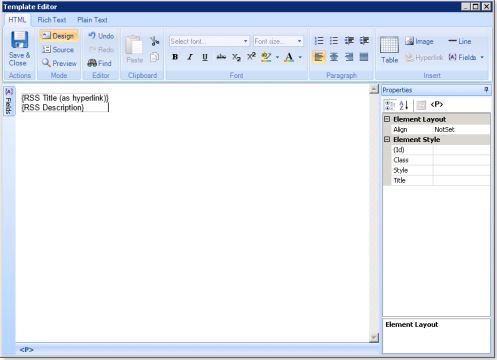
For our feed, we’re going to use the ‘{RSS Title (as hyperlink)}’ field and the ‘{RSS Description}’ field.
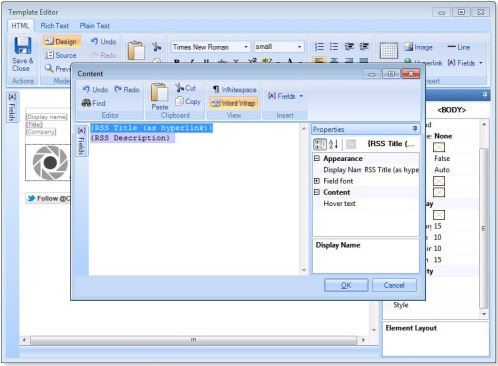
Click ‘OK’ to accept the changes.
Paste the RSS feed URL you found earlier in the ‘RSS URL’ field under ‘Properties’.
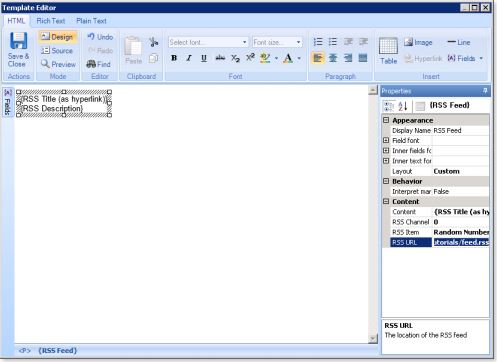
Click the 'RSS Title (as hyperlink)' box, then the field beside ‘RSS Item’ which should contain ‘Random Number’ by default.
Click the arrow that appears beside ‘Random Number’.
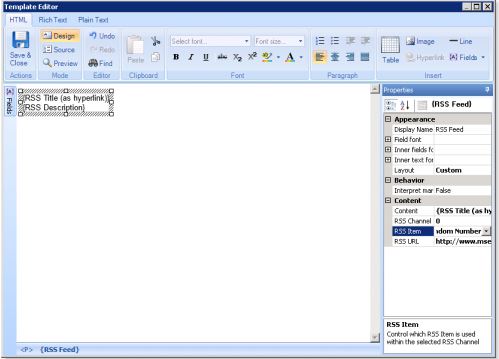
Here, we can set what logic is used to display our Tweets (or whatever social media content). Select ‘Random Number’ to leave it random, or ‘User Sequential Number’ to show a series of different tweets.
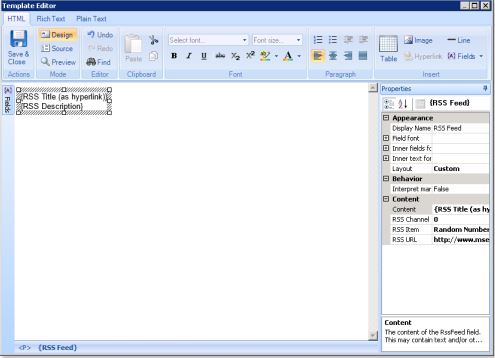
Or replace ‘Random Number’ with ‘0’ to get the most recent Tweet every time. Simply select the text ‘Random Number’, delete it and press ‘0’ on your keyboard.
Click elsewhere in the signature to confirm the change.
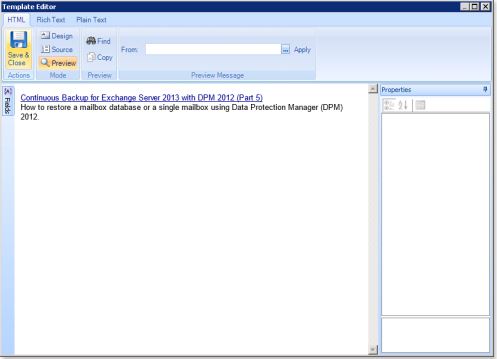
Click ‘Preview’ on the top left, beside ‘Save & Close’, to see it.
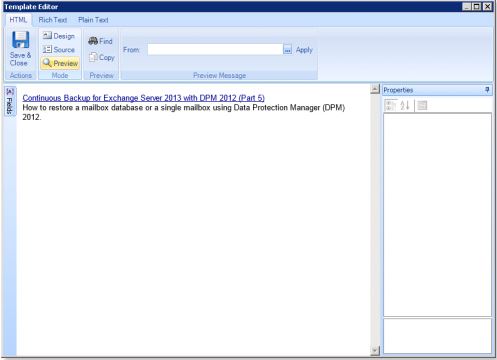
Click ‘Design’ to edit the signature again or click ‘Save & Close’ if you’re happy with it.
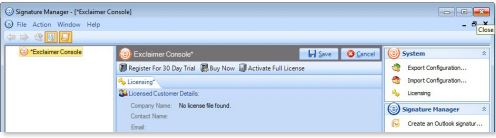
Click the ‘X’ icon in the top-right corner to close the console.
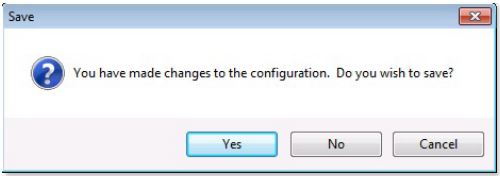
A window will appear prompting you to save before you exit, click ‘Yes’ to save your configuration and set the software deploying and generating new signatures for all your users.
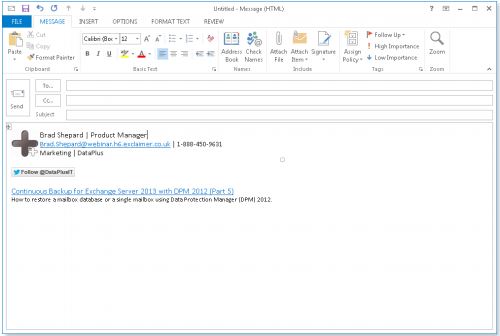
If you use Signature Manager, restart Outlook and click ‘New E-mail’. If you use Signature Manager, send an email that you are sure will trigger the policy that uses your new template.
We’ll cover the software’s user interface for inserting RSS feeds, some of the customization it allows, adding the RSS feed URL and making sure it functions correctly.
RSS feeds
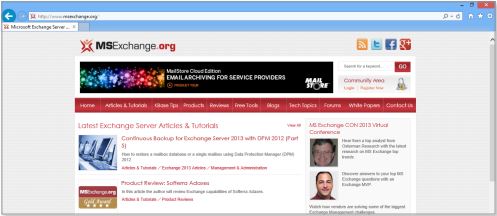
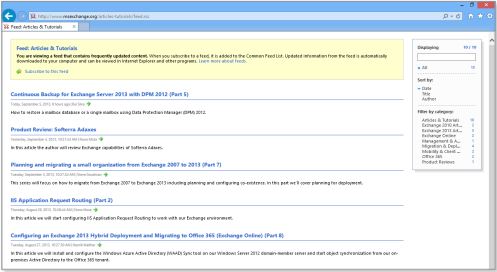
First, find your chosen social network’s RSS feed URL - we’re using one from popular Exchange server resource site, MSExchange.org.In this example, it’s ‘http://www.msexchange.org/articles-tutorials/feed.rss’, replace the URL with your own chosen RSS feed URL to make your own RSS feed.
Open the template editor in our software – make sure you select the right policy.
Select the area you’d like your feed to appear.
Click ‘Fields’ in the top-right corner, then ‘Dynamic Content’ and then ‘RSS Feed’ – or right-click and choose ‘Insert Field’, then ‘Dynamic Content’ then ‘RSS Feed’.
This opens a dedicated RSS feed editor. Here, we can decide what content from the feed will be displayed.
Click ‘Fields’ on the left to open a menu of the available content categories. Different social networks provide different content under these categories – in some social media providers, the ‘RSS Title’ field might have identical content to the ‘RSS Description’ field. You can use our ‘Preview’ function to ensure you’re happy with the appearance, which we'll describe later on.
For our feed, we’re going to use the ‘{RSS Title (as hyperlink)}’ field and the ‘{RSS Description}’ field.
Click ‘OK’ to accept the changes.
Paste the RSS feed URL you found earlier in the ‘RSS URL’ field under ‘Properties’.
Click the 'RSS Title (as hyperlink)' box, then the field beside ‘RSS Item’ which should contain ‘Random Number’ by default.
Click the arrow that appears beside ‘Random Number’.
Here, we can set what logic is used to display our Tweets (or whatever social media content). Select ‘Random Number’ to leave it random, or ‘User Sequential Number’ to show a series of different tweets.
Or replace ‘Random Number’ with ‘0’ to get the most recent Tweet every time. Simply select the text ‘Random Number’, delete it and press ‘0’ on your keyboard.
Click elsewhere in the signature to confirm the change.
Click ‘Preview’ on the top left, beside ‘Save & Close’, to see it.
Click ‘Design’ to edit the signature again or click ‘Save & Close’ if you’re happy with it.
Click the ‘X’ icon in the top-right corner to close the console.
A window will appear prompting you to save before you exit, click ‘Yes’ to save your configuration and set the software deploying and generating new signatures for all your users.
If you use Signature Manager, restart Outlook and click ‘New E-mail’. If you use Signature Manager, send an email that you are sure will trigger the policy that uses your new template.
Customer support service by UserEcho