Install and configure Mail Archiver
At download, you’ll receive a file called ‘Setup.exe’ – open it.
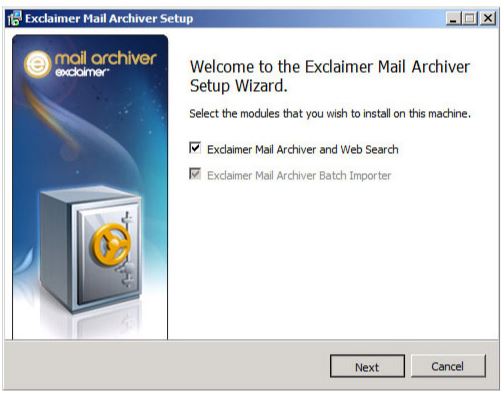
Decide which components you want to install.
Accept the terms and conditions, then click ‘Next’.
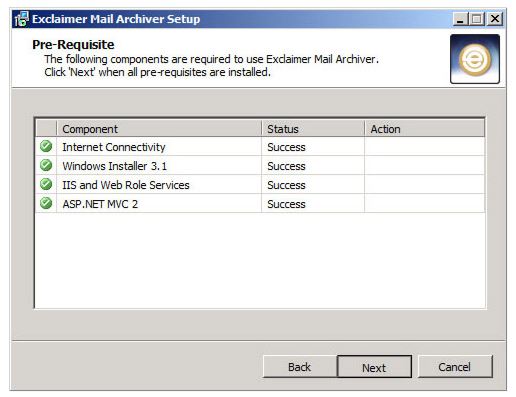
The installer will run a per-requisite check to make sure you have some necessary components installed. If you don’t it can download and install them for you. When all the pre-reqs are confirmed as present, click ‘Next’.
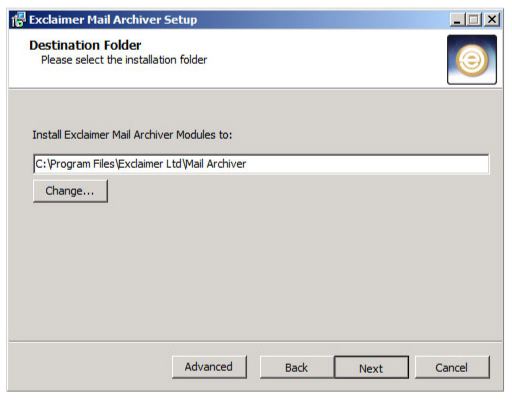
Confirm the location you want to install Exclaimer Mail Archiver to. By default, it will go to 'Program Files'. Click 'Next'.
Installation will now begin. When it's complete, click 'Finish' to launch the First Use Wizard.
The first screen explains what we will do during the wizard - create our first archive store and set up a jornaling mailbox. Click 'Next'.
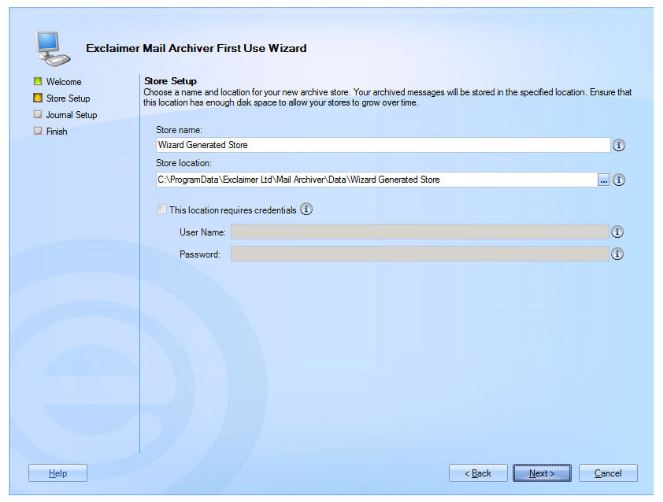
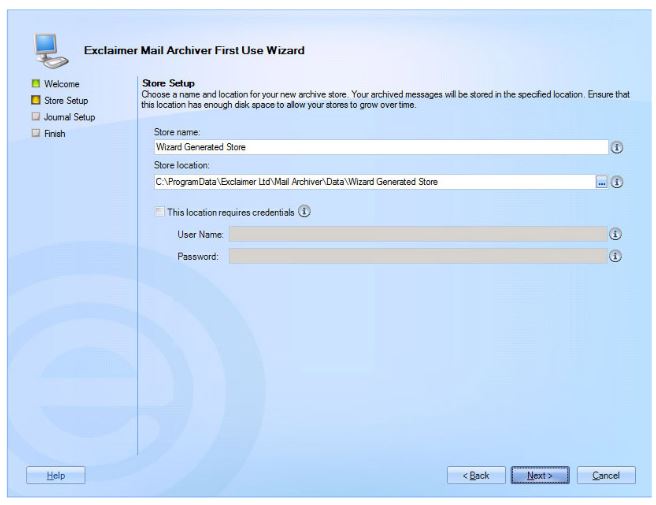
Here, we'll set up our first archive store. As the archive is stored as files within folders, you can select any area that accommodate files and folders e.g. a NAS, your hard drive, the cloud etc. When you're ready, click 'Next'.
Then, we'll set up our first journaling mailbox. If you have one already, you can select it in the above box. If you don't, we can create a new one with the username and password you enter on this screen. When you've selected or created your mailbox, click 'Next.

Wait a moment while a PowerShell script creates the new journaling mailbox and journaling rule, which will archive all emails to and from all users by default. Click 'Next'. If you aren't running the installer on an Exchange server, you'll have to run this PowerShell script manually on Exchange.
The wizard will then Autodiscover the Exchange Web Services UI. When that's complete, you can click 'Finish'. You've finished setting up Exclaimer Mail Archiver.
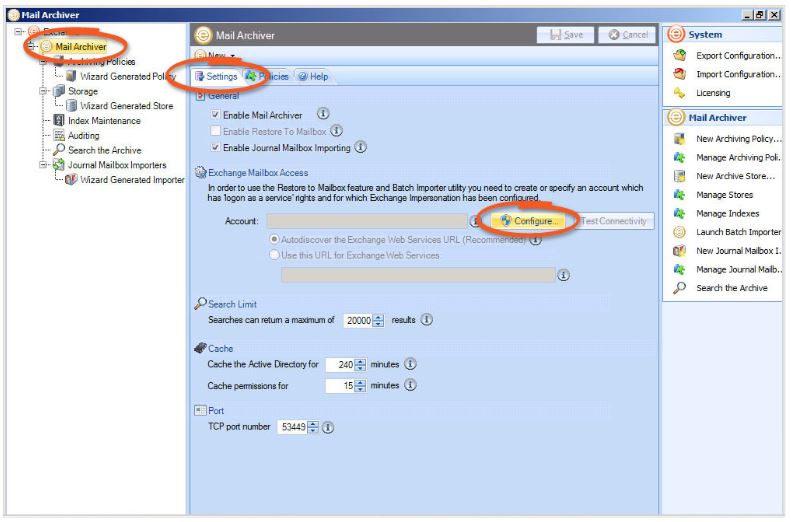
Now we're going to set up 'Restore to Mailbox' so users can return any email they find in Search back to their mailbox. Click the 'Mail Archiver' icon in the directory on the left.
Click the 'Settings' tab, then click the 'Configure' button midway down the page.
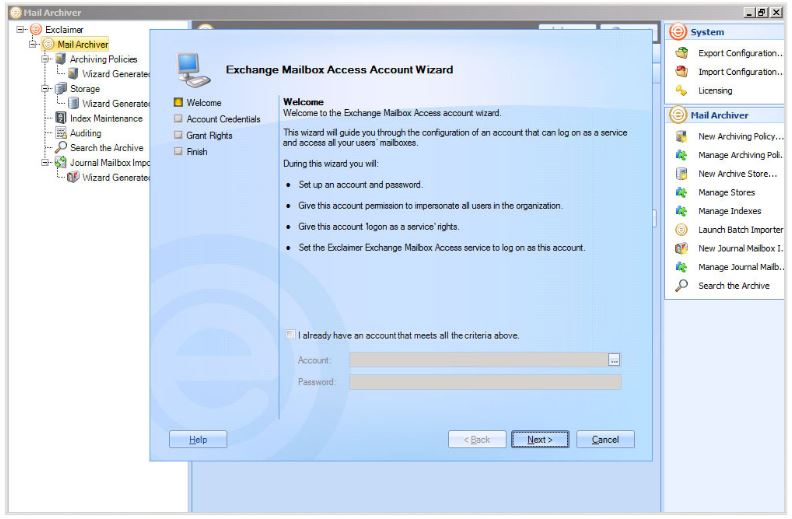
We're going to create a mailbox account which can access the Archiver and bring email into the user's mailbox, so they can see it in Outlook. This account is also necessary for Batch Importer and the 'forward message' in Web Search. If you already have an account that meets the criteria we mention on this screen, e.g. 'log on as a service' rights, enter the username and password for it here. If not, click 'Next'.
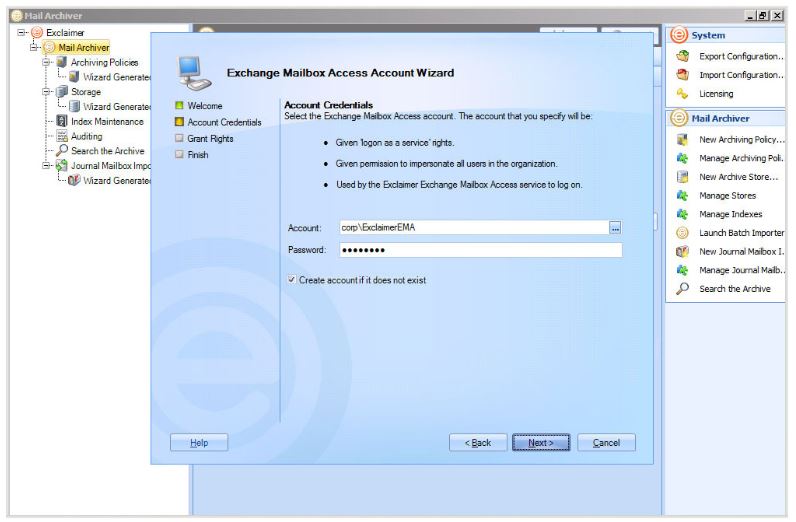
A username is provided by default, though you can change this if you wish. Enter a password for the new account and click 'Next'.
Two PowerShell scripts will run or run them manually on your Exchange server, if you have installed the Archiver elsewhere: one to create the account and one to give appropriate permissions. When each is complete, click 'Next'.
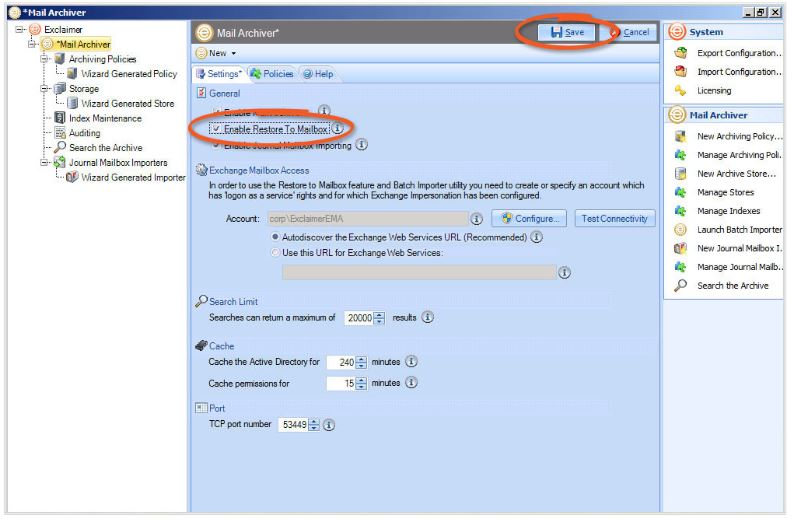
Click 'Finish' and then click the box beside 'Enable Restore to Mailbox. Then, click the 'Save' button in the top-right corner of your screen.
Decide which components you want to install.
Accept the terms and conditions, then click ‘Next’.
The installer will run a per-requisite check to make sure you have some necessary components installed. If you don’t it can download and install them for you. When all the pre-reqs are confirmed as present, click ‘Next’.
Confirm the location you want to install Exclaimer Mail Archiver to. By default, it will go to 'Program Files'. Click 'Next'.
Installation will now begin. When it's complete, click 'Finish' to launch the First Use Wizard.
The first screen explains what we will do during the wizard - create our first archive store and set up a jornaling mailbox. Click 'Next'.
Here, we'll set up our first archive store. As the archive is stored as files within folders, you can select any area that accommodate files and folders e.g. a NAS, your hard drive, the cloud etc. When you're ready, click 'Next'.
Then, we'll set up our first journaling mailbox. If you have one already, you can select it in the above box. If you don't, we can create a new one with the username and password you enter on this screen. When you've selected or created your mailbox, click 'Next.
Wait a moment while a PowerShell script creates the new journaling mailbox and journaling rule, which will archive all emails to and from all users by default. Click 'Next'. If you aren't running the installer on an Exchange server, you'll have to run this PowerShell script manually on Exchange.
The wizard will then Autodiscover the Exchange Web Services UI. When that's complete, you can click 'Finish'. You've finished setting up Exclaimer Mail Archiver.
Now we're going to set up 'Restore to Mailbox' so users can return any email they find in Search back to their mailbox. Click the 'Mail Archiver' icon in the directory on the left.
Click the 'Settings' tab, then click the 'Configure' button midway down the page.
We're going to create a mailbox account which can access the Archiver and bring email into the user's mailbox, so they can see it in Outlook. This account is also necessary for Batch Importer and the 'forward message' in Web Search. If you already have an account that meets the criteria we mention on this screen, e.g. 'log on as a service' rights, enter the username and password for it here. If not, click 'Next'.
A username is provided by default, though you can change this if you wish. Enter a password for the new account and click 'Next'.
Two PowerShell scripts will run or run them manually on your Exchange server, if you have installed the Archiver elsewhere: one to create the account and one to give appropriate permissions. When each is complete, click 'Next'.
Click 'Finish' and then click the box beside 'Enable Restore to Mailbox. Then, click the 'Save' button in the top-right corner of your screen.
Customer support service by UserEcho