MAPI Provider Support
The Batch Importer requires a MAPI provider installed in order to import email messages from Microsoft Exchange Mailboxes. If you do not have a MAPI provider installed, or the MAPI provider installed is not suitable, then you will receive an error from Batch Importer once you have selected the store you wish to import your message to.
Note: Importing from PST Files or Public Folders does not require a MAPI provider to be installed.
Please install the MAPI provider for your version of Exchange from the table below:
| MAPI Provider | Exchange 2007 | Exchange 2010 | Exchange 2013 | Exchange 2016 | ||
|---|---|---|---|---|---|---|
| Without 2003 Support | With 2003 Support | Without 2003 Support | With 2003 Support | |||
| Outlook 2003 | X | X | ||||
| Outlook 2007 x86 & x64 | X | X | X | X | ||
| Outlook 2010 x86 & x64 | X | X | X | X | ||
| Outlook 2013 x86 & x64 | X | X | X | X | X* | |
| Outlook 2016 x86 | X | |||||
| MAPI CDO | X** | |||||
* Recommended
** Minimum May 2013 release of MAPI CDO 1.2.1 version 6.5.8320 and above.
Note: If you have multiple versions of Microsoft Exchange in your organization use the lowest version currently deployed. Also note that once you have installed an appropriate MAPI client you will need to restart the computer before you can use Batch Importer.
Note: If Outlook has previously been installed, remove the system variable: EXMAPI_PROFILE. This is done via: Control Panel > System > Advanced System Settings > Environmental Variables.
With/Without 2003 Support
The columns Without 2003 support and With 2003 support are related to the answer given when Microsoft Exchange was first installed (or upgraded from Exchange 2003 or lower) in your organization.
Check by using Microsoft Outlook:
- On any provider computer in your organization open Microsoft Outlook.
- Click the Folder icon in the bottom left of the window. (You may have to select More... or … depending on the version of Microsoft Outlook you are using).
- The list of folders updates. If the list includes Public Folders, then you have 2003 support.
Check by using the Exchange Management Shell on your Microsoft Exchange server:
- On your Microsoft Exchange server, start the Exchange Management Shell:
Click Start > All Programs > Microsoft Exchange Server > Exchange Management Shell
-or-
For Windows Server 2012 and 2012 R2, point your mouse to the upper-right corner of the screen. Moving the mouse pointer down, click Search from the charm menu and type Exchange Management Shell in the search field - press Enter and choose Exchange Management Shellfrom the search results. - Type the following command into the Exchange Management Shell:
@(Get-PublicFolderDatabase).count - Press Enter to run the command. If you are returned a number greater than zero, you have 2003 support.
- Close the Exchange Management Shell.
Configuring Outlook 2016 as Your MAPI Provider for Exchange 2016
If you have Exchange Server 2016, and need to set up a MAPI provider to allow the Mail Archiver Batch Importer to import emails directly from your Exchange mailboxes, please follow instructions below.
Note: the 64 bit version of Outlook 2016 is NOT supported as a MAPI provider for the Mail Archiver Batch Importer.
- Configure the Exchange Mailbox Access service account in Mail Archiver. Full details can be found in the user manual, here.
- Install Outlook 2016 32-bit onto the server with Mail Archiver installed.
- Log on to the Mail Archiver server using the account configured for the Exchange Mailbox Access service. By default this would be ExclaimerEMA.
- Create an Outlook profile, and make note of the profile name (by default, this will be Outlook ).
- Enter account details for the Exchange Mailbox Access service account:

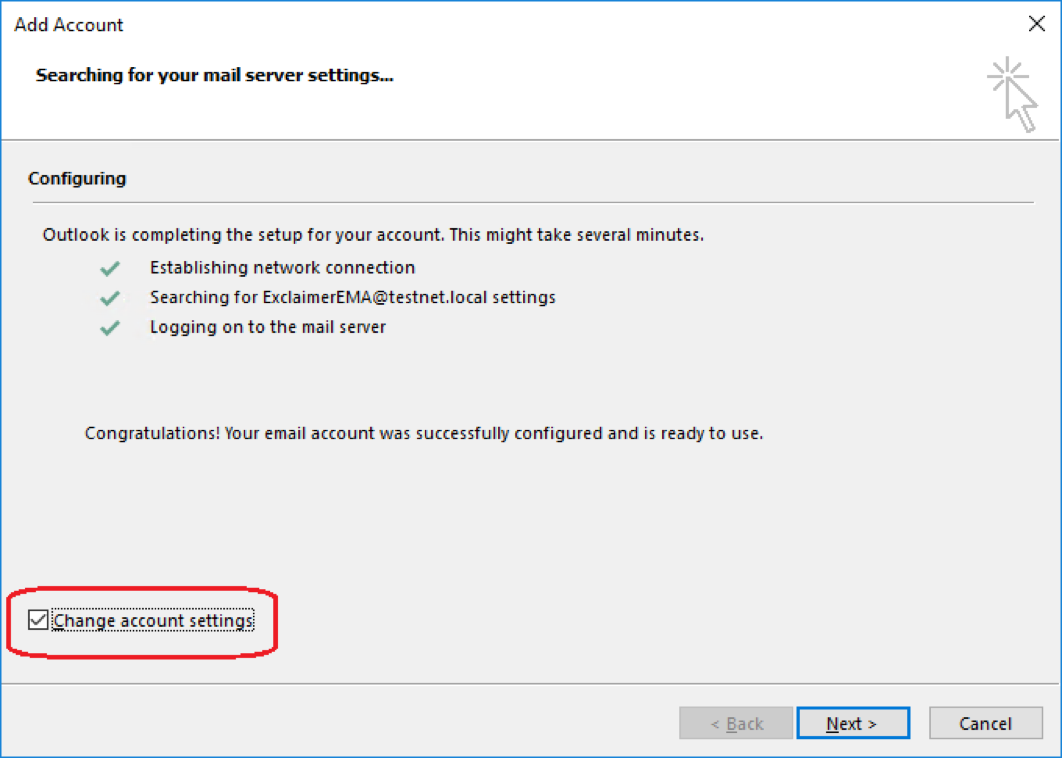
- Click Next, select Change account settings, and click Next again:
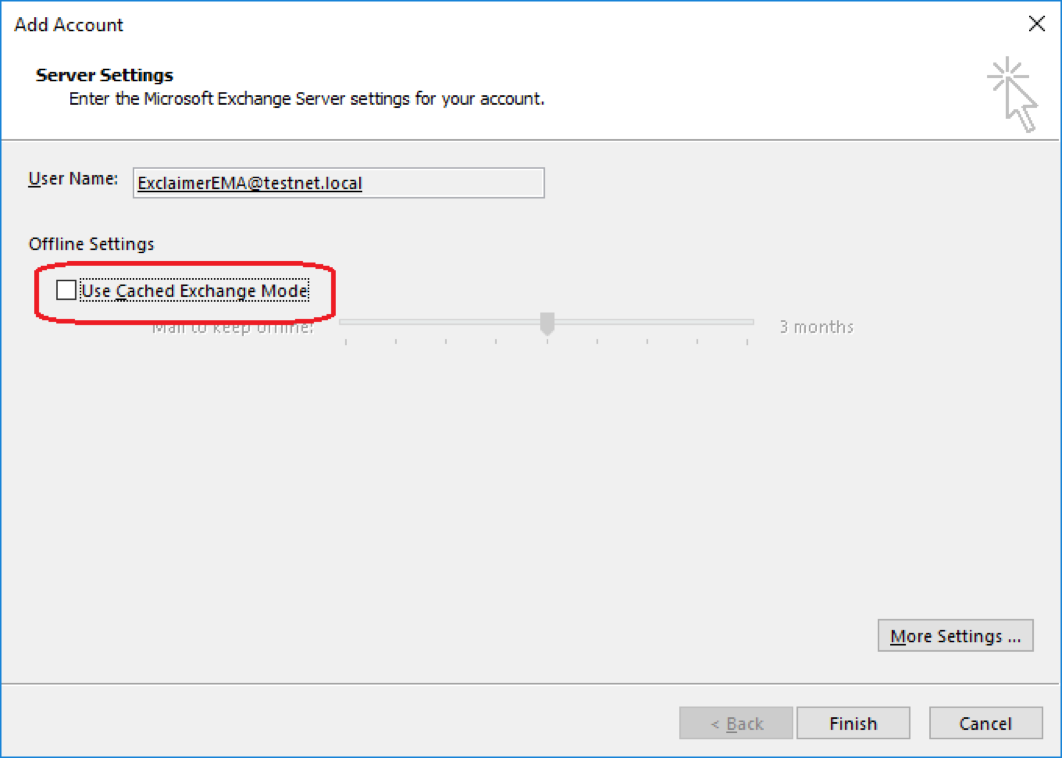
- Uncheck Use Cached Exchange Mode for the new mail profile, and click Finish:
- Close Outlook.
- Next you need to add a System Variable on the server with Mail Archiver installed. To do this:
- Log on to the server with Mail Archiver installed, using an account with administrator privileges.
- Open the Control Panel and click System.
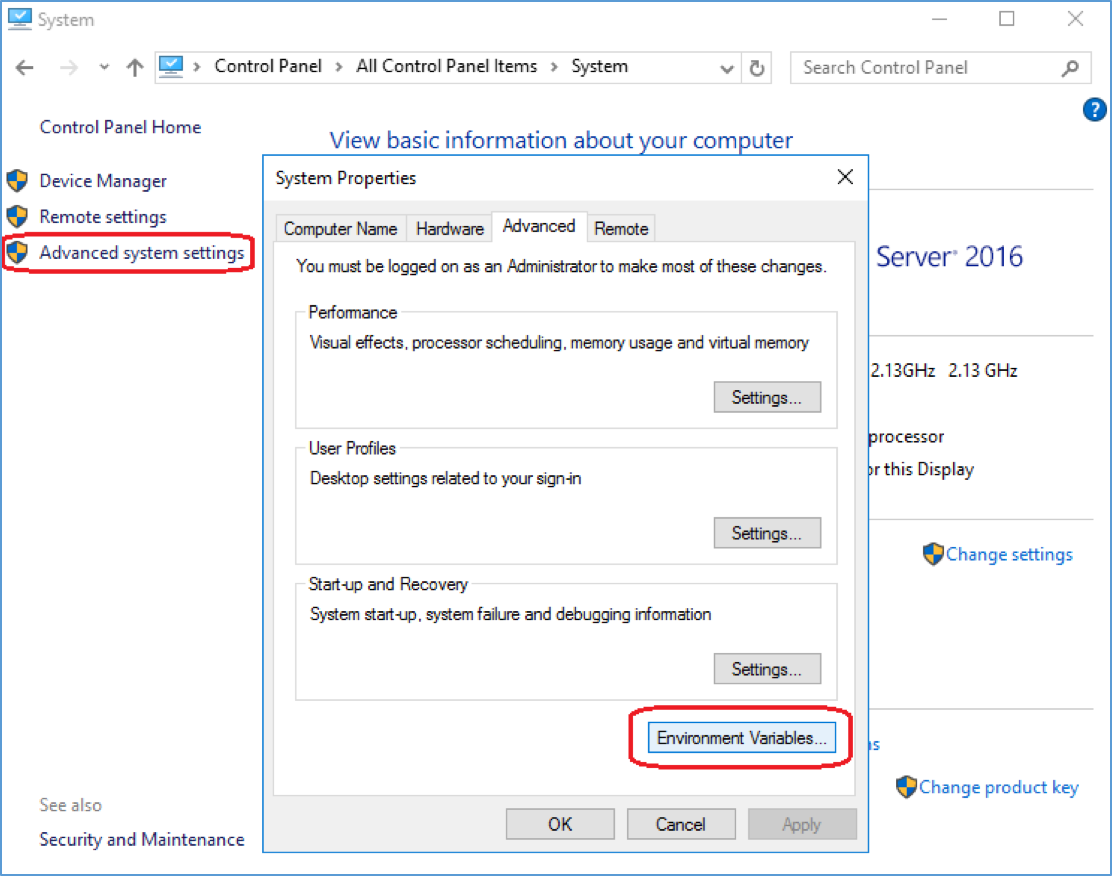
- Click Advanced System Settings on the left-hand side.
- On the System Properties Advanced tab, click Environment Variables…:
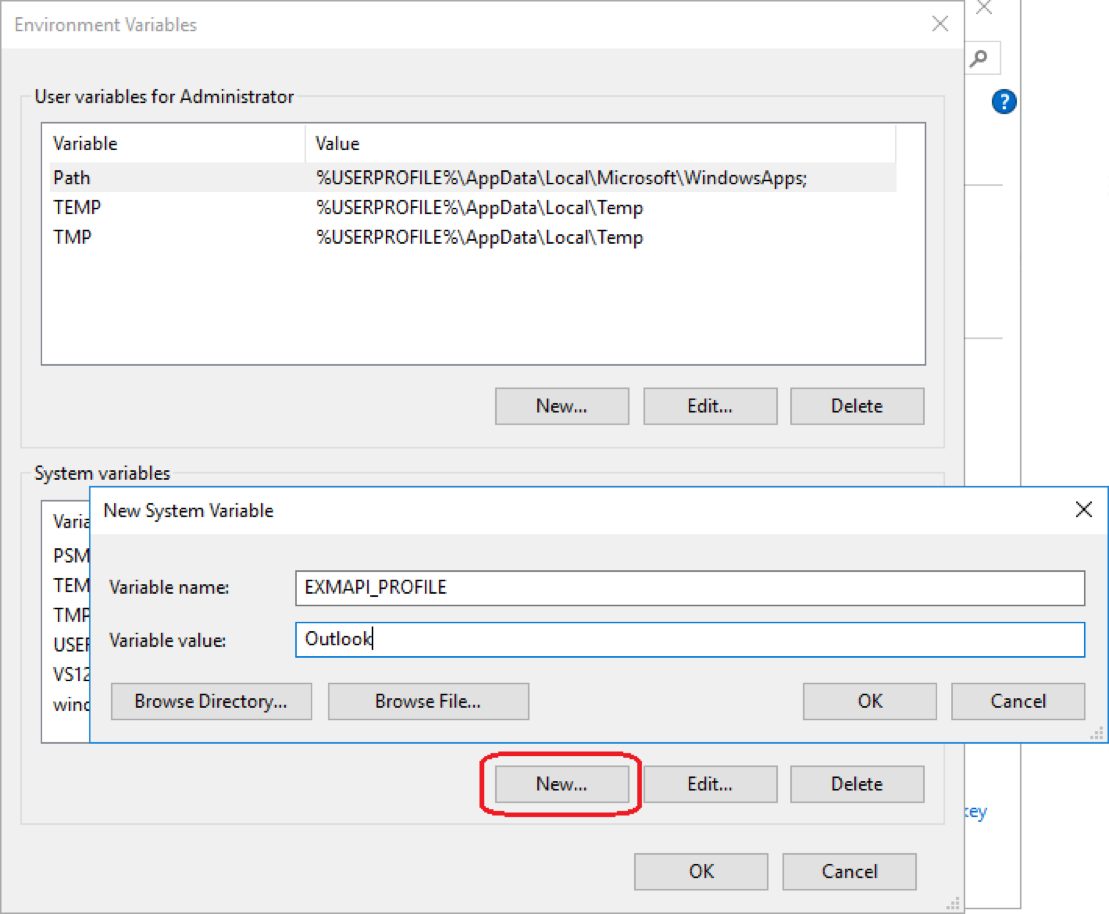
- Under System Variables, click New...
- Add a new variable with the name EXMAPI_PROFILE (all uppercase).
- Enter the name of the Outlook profile created in step 3 above under Variable value (this is case sensitive):
- Click OK, OK and OK again to save the new system variable.
Once complete you will be able to import emails from the mailboxes on your Exchange 2016 server, using Mail Archiver’s Batch Importer.
Customer support service by UserEcho